


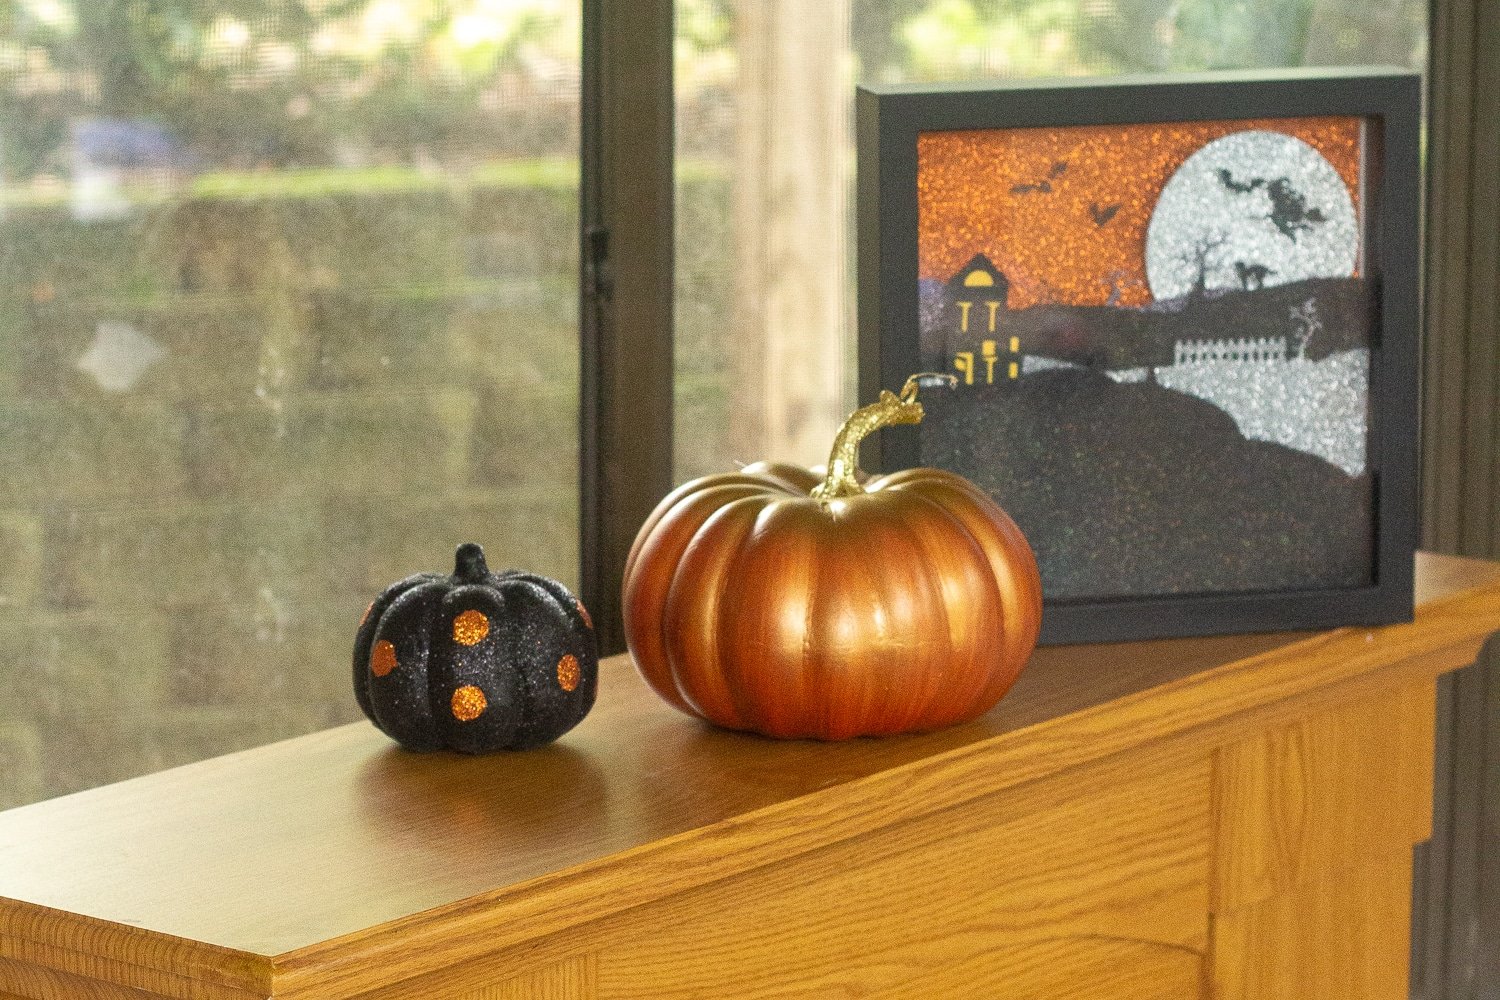
I just finished making this adorable Halloween Scene with free SVG that the kids absolutely love! It’s the perfect Halloween scene setter for your entryway or living room.
It’s not a crazy hard project, but it’s got all these tiny little cuts that make it a project you really need a cutting machine for. Like, really, if I didn’t have a Cricut for this, I’m not sure I would have been willing to tackle it, because of the cuts on that witch–wow.

But what’s really cool about this fun Halloween haunted house scene is that you can scale it down or scale it up and make something way big–or way small, depending on what you need it for. Plenty of space for text, if you want to add it, but not so much that you feel like you HAVE to fill it.
I really feel like this free Halloween SVG is the most awesome Halloween project I’ve done this year.
Cricut Halloween Scene With Free SVG
So, I wasn’t really setting out to make this free SVG with any specific purpose in mind. I just knew I needed something cute and clever to add to my Halloween table. But, when inspiration struck, well, I knew exactly what I wanted.
That witch, the fence, the spooky trees, I’m absolutely in love.
It’s like a whole moment stolen while she’s riding across the moon’s light. Seriously, the pictures do not even do it justice, it’s so dang cute.
 What Do You Use This Halloween Scene Setter Cut File For?
So, I plan to put 3D Halloween scene setter in my entryway, with my pumpkins and all my fun spooky Halloween decor. You know, the normal thing. But this would also make a for some other really cool ideas, including:
- Teacher Gift
- Halloween Party Invitation
- Photo Backdrop
- “We’re Away Trick-or-Treating” Sign to Put with your Bowl of Candy on the Porch
- Window Decor
- Wall Art
- Party Decoration
See? So many ideas. All you have to do is make one!
What Do You Need to Make This Cricut 3D Halloween Scene?
Seriously, these are so simple, you’re going to laugh. But you’re going to make this 3D Halloween wall decor from paper. Yeah, that’s it. I mean, putting it in a shadow box, sure, but the actual Halloween haunted house scene is just simple card stock paper.
You could make this from vinyl and make a big scary wall decal, if you want, or make it from craft foam or balsa wood using the Cricut maker or Silhouette Cameo 4, to give it even more depth. If you use the balsa wood, though, you’ll have to paint it. So just be aware that if you do make it from wood, it will add some additional time to the overall craft.
You’ll obviously also need the cut files. You can just scroll on down to get the SVG file you need and pop it into Design Space. It’s been tested (by me, see the pictures? I made that from this same file on my cutting machine), so I know it works.
How do You Make This Halloween Home Decoration Idea?
So, as I said, you’re going to need some glitter card stock paper in:
And as far as shadow boxes, I always get them here at amazing deals! They are always on sale, and you can ship to store to avoid shipping costs!
Then just load the SVG file to Design Space and cut each mat. Go ahead and weed each design, then layer the design elements one on top of the other.
Ignore the ambiguity of the black cat/wolf. I can’t decide which it is, either. Maybe the witch can tell us.
Then you put everything in your shadow box and you’re done.
Just set it up on your end table in your living room or on your spooky wall in the entry.
Easy enough. But, if you want the full step by step directions, keep reading.
More Fun Cricut Halloween Projects You’ll Love
I seriously love making Halloween decorations. They’re ridiculously fun and the kids just love seeing them all over the house. So, needless to say, I’ve been busy. Here are some of my favorites I’ve made recently:

How to Make A Cricut Halloween Scene
I just finished making this adorable Halloween Scene with free SVG that the kids absolutely love! It's the perfect halloween scene setter for your entryway or living room.
Materials
Glitter Cardstock
Tools
- Cricut or Other cutting machine
- Light Grip Mat
Instructions
- Download my free file, enter your email address above and it will be emailed to you.
- Upload the files into your cutting machine program.
- Resize to fit your shadowbox, if you got the box above then resize the image to 8.5 by 8.5.
- The witches and bats are small so make sure you have a blade that is sharp. I keep these ones on hand always.

- Change the colors on the Free SVG file to match your cardstock colors.
- Click make it.
- Adjust the design on your mat if necessary.
- Click continue.
- Cut all of the pieces out and remove them from the mat.
- Using the tape attach the orange to the back of your shadowbox.
- Next, use the foam adhesive, making sure to put along the edges and middle, on each layer to make it stand up taller than the previous layer.
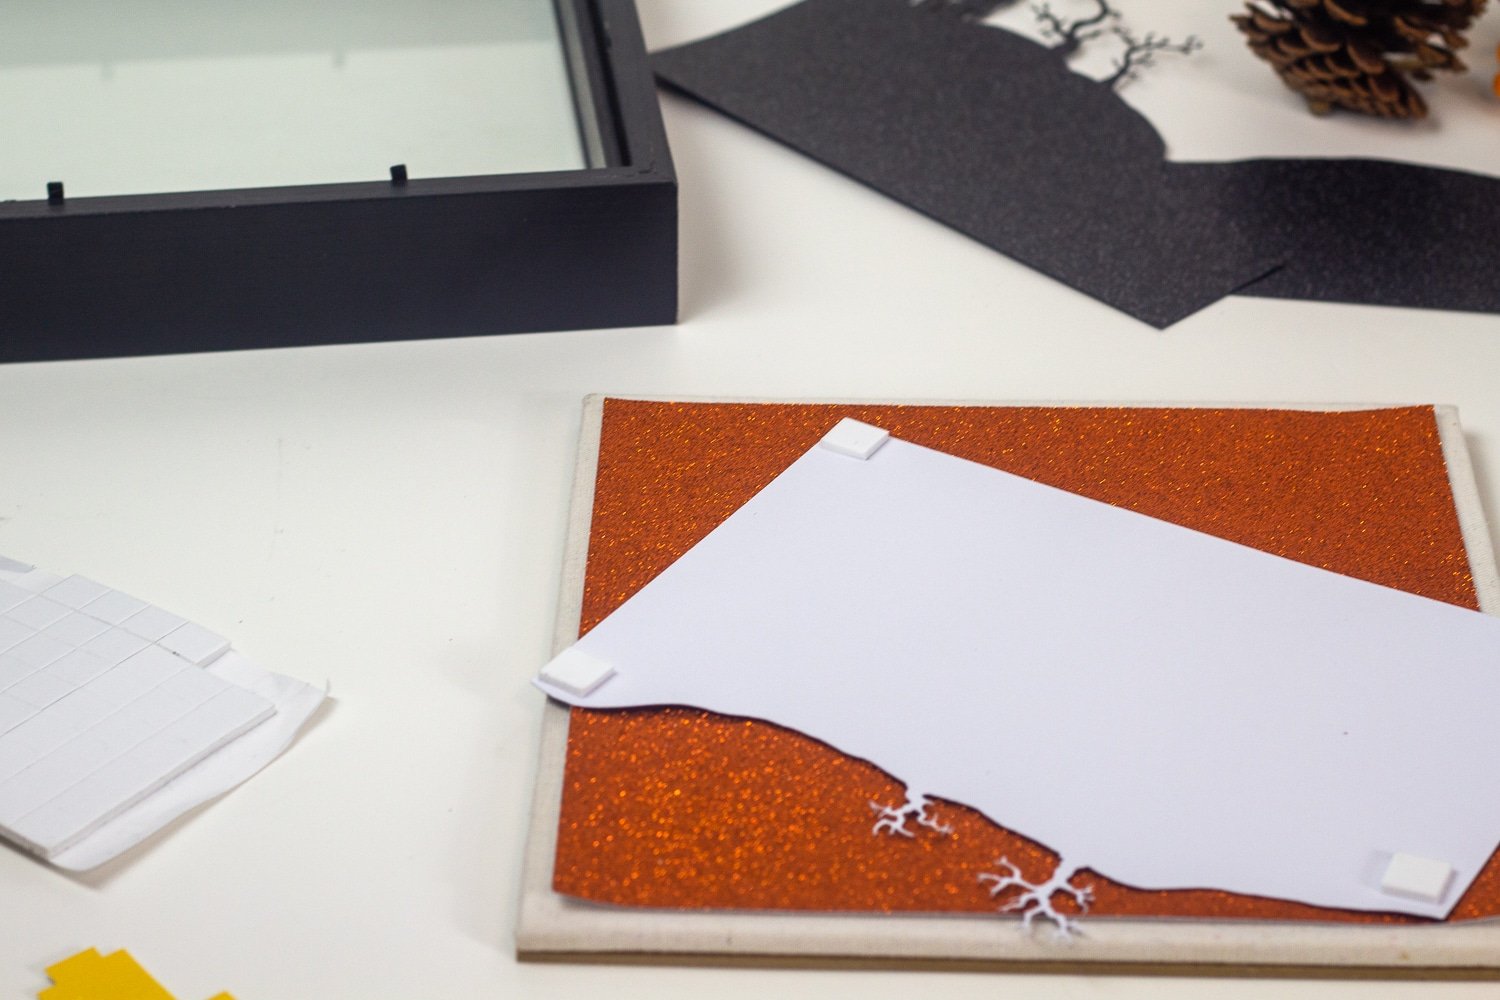
- Follow my images if you need help with the order of the cardstock pieces.
- Instead of getting 2 different sizes of foam, I cut down the large pieces so that they fit my bats, and witch and stuff.
- Place those on your scene.

- You can add lights optionally. I didn't.


Thank you. This is so cute!
I can’t seem to download the Halloween scene. Can you send the SVG to me?
Check in the post, right above the instructions.